
Ever wondered if you're cleaning your golf clubs the right way? It's not just about giving them a quick wipe with a towel. We're talking about a proper scrub-down with warm, soapy water and a soft brush to get deep into those grooves, followed by a thorough rinse and dry. Think of it less as a chore and more as a crucial part of your game prep.
This simple habit doesn't just protect your investment; it genuinely makes a difference in how you play.
Why Bother Cleaning Your Clubs? It Actually Matters
So, does that bit of caked-on mud from your last round really hurt your game? Spoiler alert: it absolutely does. A lot of golfers see cleaning their clubs as just another task, but it’s probably the easiest way to improve your performance without touching your swing. This isn't just about looking like you have your act together—it's about physics.
When you let dirt, sand, and grass build up in the grooves of your irons and wedges, you're messing with the club's design. Those grooves are precision-engineered to create spin, which is what gives you control, especially when you're firing at the pin. Gunk-filled grooves kill that spin, turning what should have been a great shot into a frustrating one that skids off the back of the green.
What Dirty Grooves Are Doing to Your Shots
Think of your club's grooves like the treads on a tire in the rain. They're there to channel away water and debris so the clubface can make clean, solid contact with the ball. When they're clogged, the ball can literally slide up the face instead of being gripped by it.
This leads to some seriously frustrating problems:
- Reduced Backspin: This is the big one. Less spin means the ball won't bite and hold the green. You lose that crucial stopping power.
- Wacky Launch Angles: A layer of grime can actually change how the ball launches off the face, making your shots fly in unpredictable ways.
- Zero Distance Control: How can you dial in your distances when you can't rely on consistent spin and ball flight? You can't.
Don't just take my word for it. The drop-off in performance is real and measurable. Studies show that a significant amount of debris on the clubface can slash ball spin by up to 20%, which completely wrecks your control. For more on this, you can read the full research on golf equipment to see how tech and maintenance impact the game.
Ultimately, keeping your clubs clean is one of the simplest things you can do to protect your gear and make sure every swing has a chance to be your best.
Building Your Ultimate Club Cleaning Toolkit
Forget those expensive, pre-packaged kits you see in the pro shop. You can assemble a much better, far more practical cleaning arsenal with stuff you probably already have lying around the house. The real goal here is to create a simple, grab-and-go toolkit that makes cleaning your clubs feel less like a chore and more like part of the game.
It's no surprise that taking care of your gear has become a big deal. The global market for golf cleaning accessories has ballooned to over $312 million. That’s a lot of golfers realizing that clean clubs mean better shots. While those all-in-one kits are tempting, you can build a superior one yourself. If you're curious, you can get more of a deep dive into this growing golf accessories market.
Your Core Cleaning Essentials
Let's start with the basics. You don't need much to get your clubs looking sharp and performing their best.
- A Bucket of Warm Water: Nothing fancy here. Just make sure it's deep enough to cover your iron heads completely. A quick tip: steer clear of hot water. Too much heat can weaken the epoxy holding the ferrule—that little plastic bit where the shaft meets the head—and cause it to come loose.
- Mild Dish Soap: Just a couple of squirts will do. You want enough to create some suds to break down the grime, but not so much that you're left with a soapy residue.
- A Soft-Bristle Brush: This is your MVP. An old toothbrush works great, or you can grab a dedicated nylon club brush. The key is soft bristles. They’re tough enough to get into the grooves but gentle enough that they won't scratch the clubface.
A word of warning: If you have a wire brush, do yourself a favor and toss it in the trash. Right now. Seriously. They may seem like they'll power through caked-on mud, but they will absolutely destroy your club faces with scratches, ruin the finish, and open the door for rust.
This infographic breaks it down perfectly. This is all you really need to get the job done right.
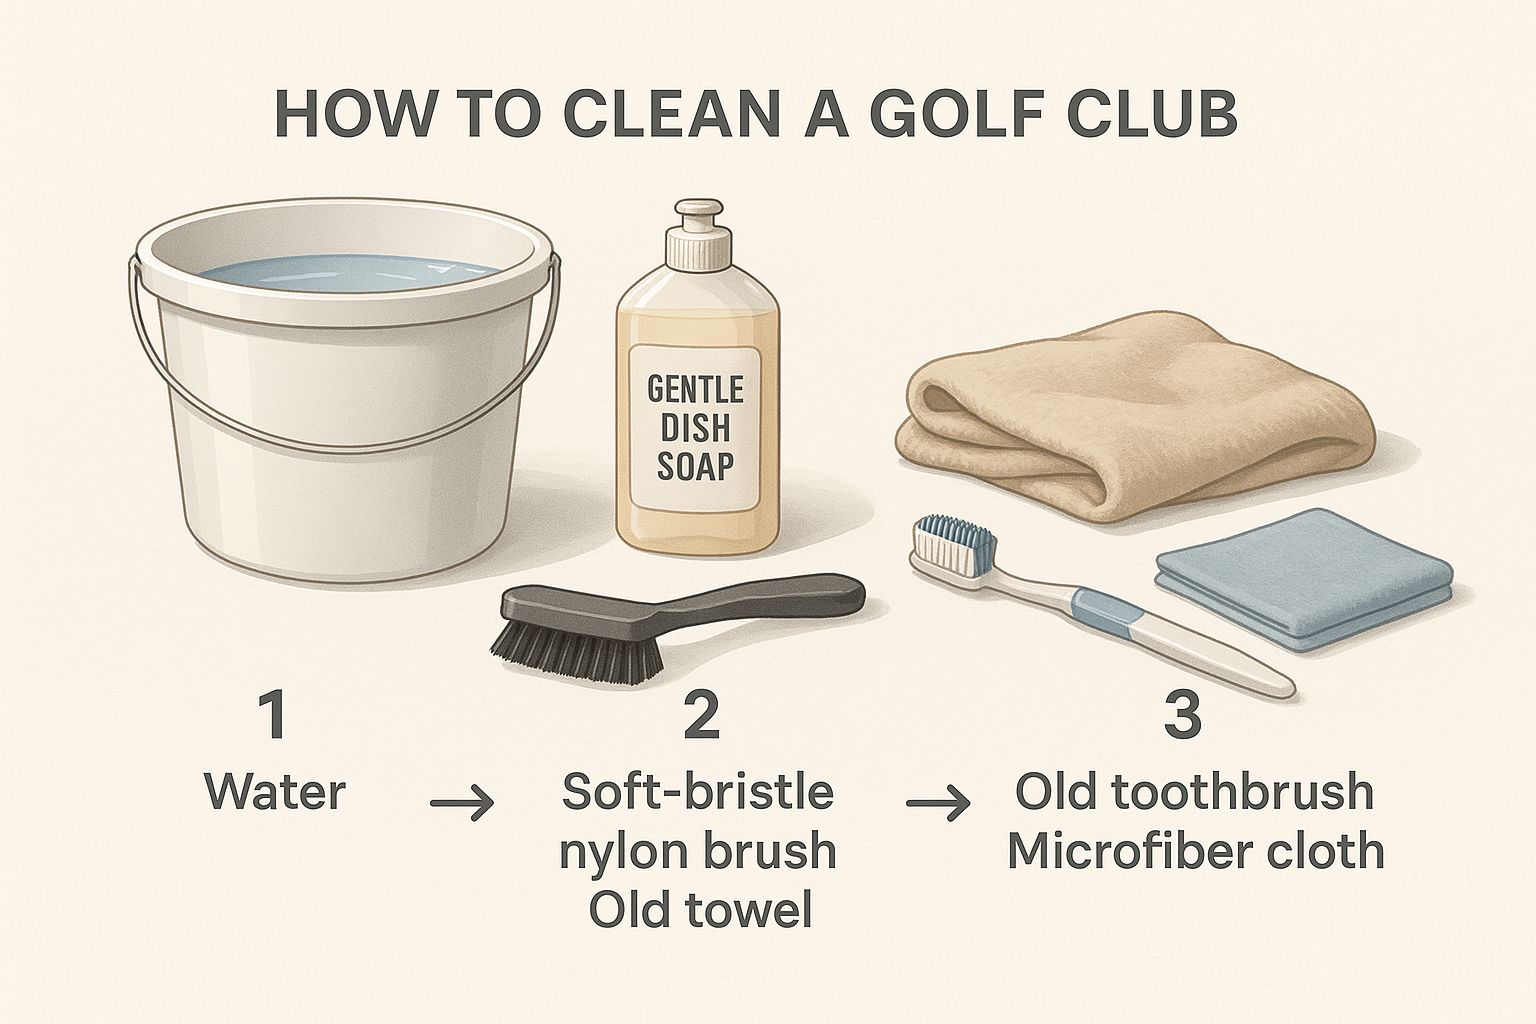
As you can see, sometimes the simplest tools are the most effective. It's all about gentle, thorough cleaning.
Nice-To-Have Upgrades
Got the essentials down? A couple of extra items can really take your club maintenance to the next level. A dedicated groove tool is fantastic for digging out that stubborn, packed-in dirt that a brush can’t quite reach. In a pinch, a simple golf tee works wonders, too.
And my final pro tip? Ditch the old bath towel you've been using and switch to a microfiber one. It gives your clubs a fantastic, lint-free shine and makes them look practically new again. It’s a small change that makes a huge difference when you pull that 7-iron on the first tee.
The Deep Clean Method for Irons and Wedges
Alright, this is where the real work—and the real satisfaction—comes in. Your irons and wedges are your scoring clubs. They're all about precision, and giving them a proper deep clean is more than just maintenance; it's a ritual that gets you dialed into your gear. The goal here is simple: get those grooves looking brand new for that killer spin and control we're all chasing.
The Soapy Bath
First things first, grab your bucket and fill it with warm water. And I mean warm, not hot. If the water is too hot, it can mess with the epoxy holding the ferrule in place (that little plastic ring where the shaft meets the clubhead). Over time, that can cause it to loosen up, and nobody wants that.
A couple of squirts of a gentle dish soap is all you need. You're not washing a greasy pan, just lifting some grime.
Pop your irons and wedges into the bucket, making sure the heads are completely underwater but the water line stays below those ferrules. Let them hang out and soak for about 5 to 10 minutes. This little bath gives the soapy water enough time to work its magic on the caked-on dirt without giving moisture a chance to sneak into the hosel.
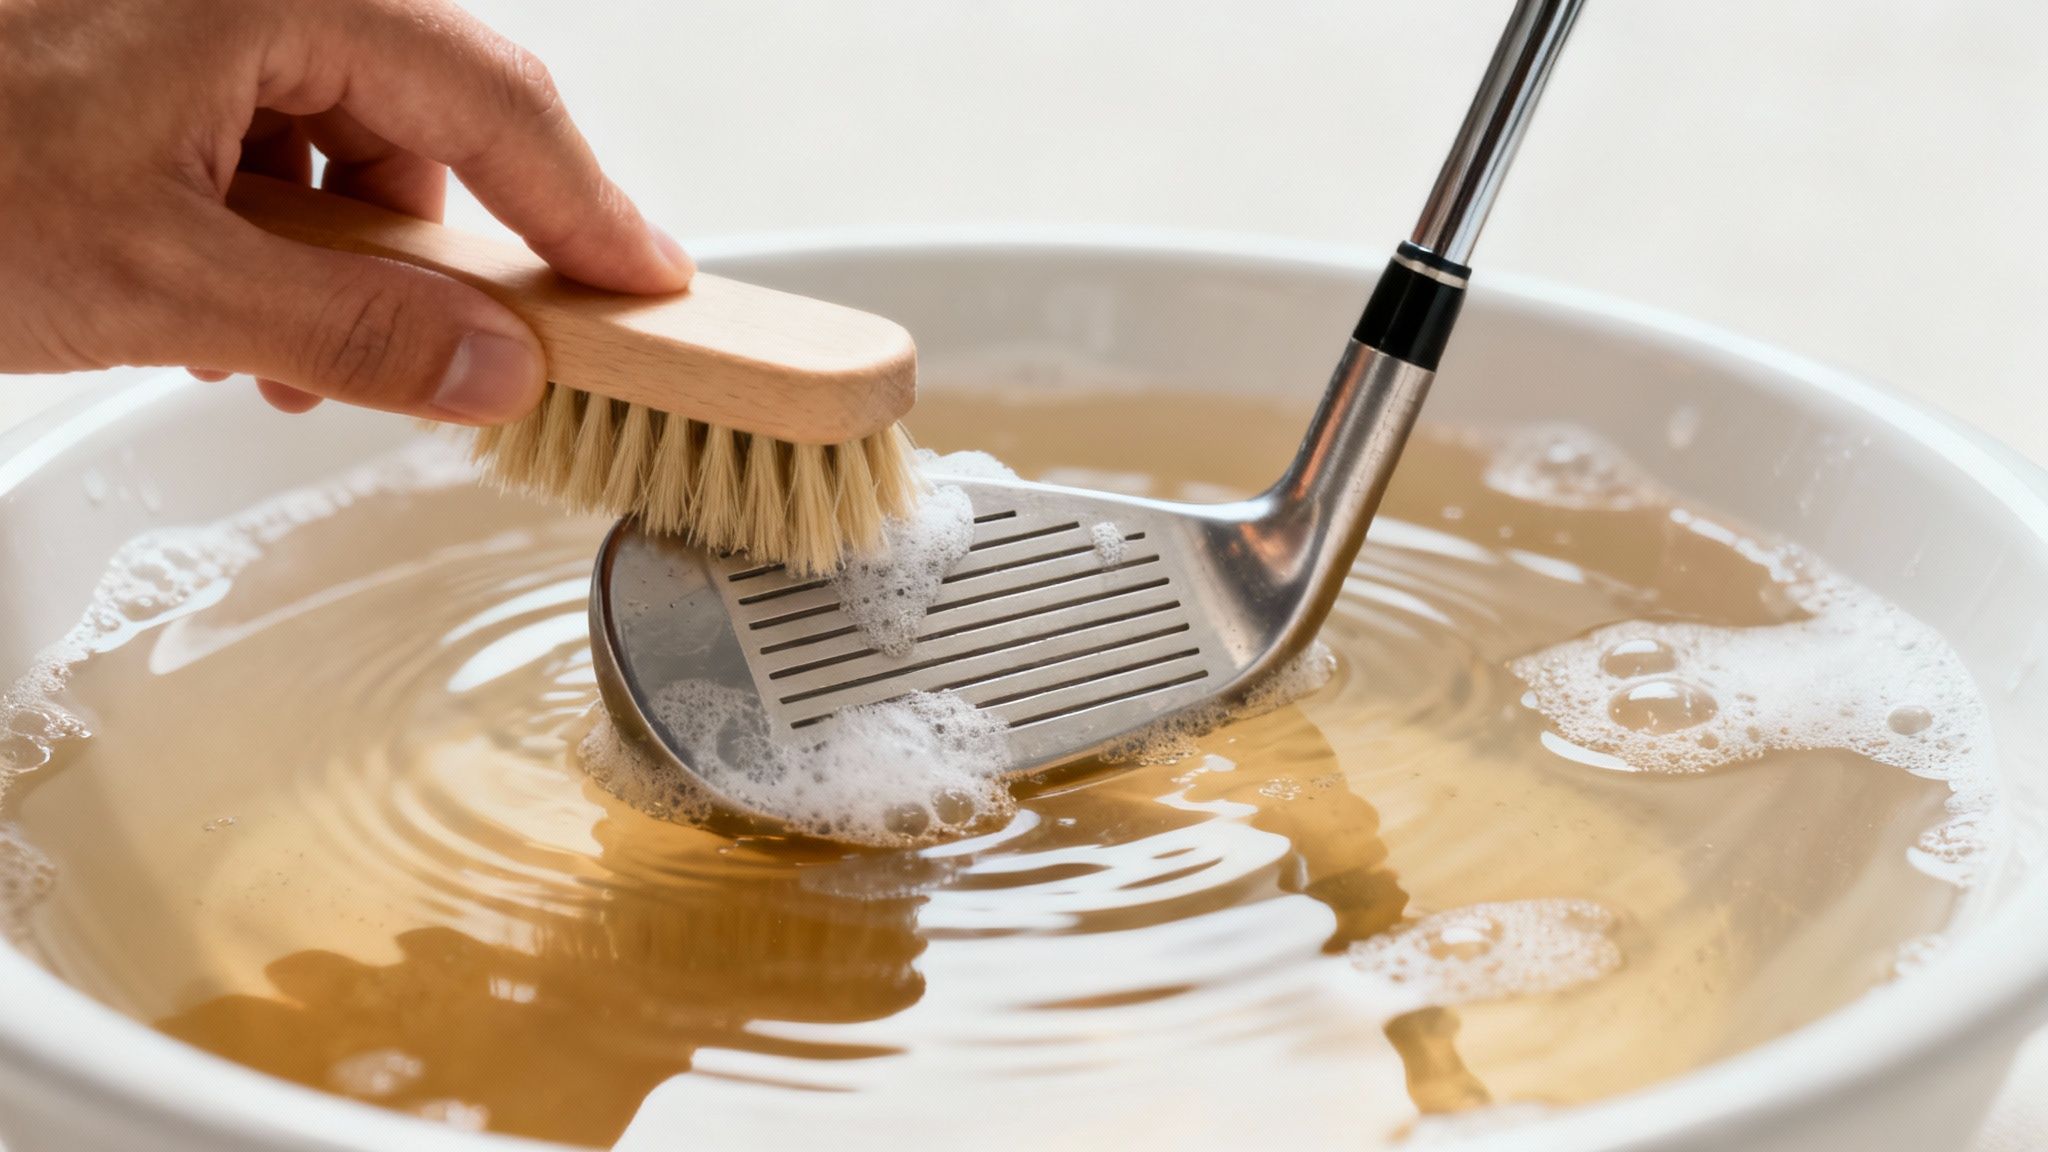
The Perfect Scrubbing Technique
Once they've had a nice soak, pull them out one at a time. Dip your soft-bristle brush back into the soapy water and get to work on the clubface. Use a firm but gentle circular motion, paying special attention to getting every last bit of junk out of the grooves. This is the moment you’ll see all that mud and sand from your last round finally give up the ghost.
Don't stop there! The sole and the back of the clubhead pick up plenty of dirt too, which can subtly throw off the club's balance. Give them a good scrub as well.
Pro Tip: Got some ridiculously stubborn crud packed deep in a groove? A simple wooden or plastic golf tee is your secret weapon. It’s got just enough oomph to dig out the grime without scratching the face like a metal tool would.
Before you move on, give the shaft a quick wipe-down with the soapy brush to get rid of any fingerprints or dirt that’s made its way up there.
Rinse, Dry, and Protect
Next up, rinse each clubhead under a gentle stream of cool tap water. You want to get all the soap off. Any residue left behind is just a magnet for more dirt next time you're on the course.
Now for what might be the most important step in fighting off rust: drying. Grab a clean, dry towel (microfiber is fantastic for this) and meticulously dry every single nook and cranny of the clubhead and shaft. Really get into those grooves and any cavities on the back of the club.
Want to take it to the next level? If you happen to have an air compressor, a quick blast of air into the grooves guarantees 100% of moisture is gone. It sounds a little extra, but it's the absolute best defense against rust, keeping your money-makers in perfect shape for your next round.
A Gentler Approach for Your Woods and Hybrids
Whatever you do, do not give your driver, woods, or hybrids the same bucket-soak treatment as your irons. It’s a classic rookie mistake. These clubs are a different breed entirely, often built with hollow heads and fancy internal weighting.
Letting one of these take a bath is a surefire way to kill it. Water can seep in through the tiniest openings, leading to internal rust you can't even see. Before you know it, that satisfying ping at impact turns into a dull, lifeless thud. Game over for that club.
So, for your big sticks, the mantra is simple: wipe, don’t soak. We're on a mission to protect the most expensive and delicate clubs in your bag while still getting them gleaming for that first tee shot. It's a bit of a delicate dance, but it's easy once you get the hang of it.
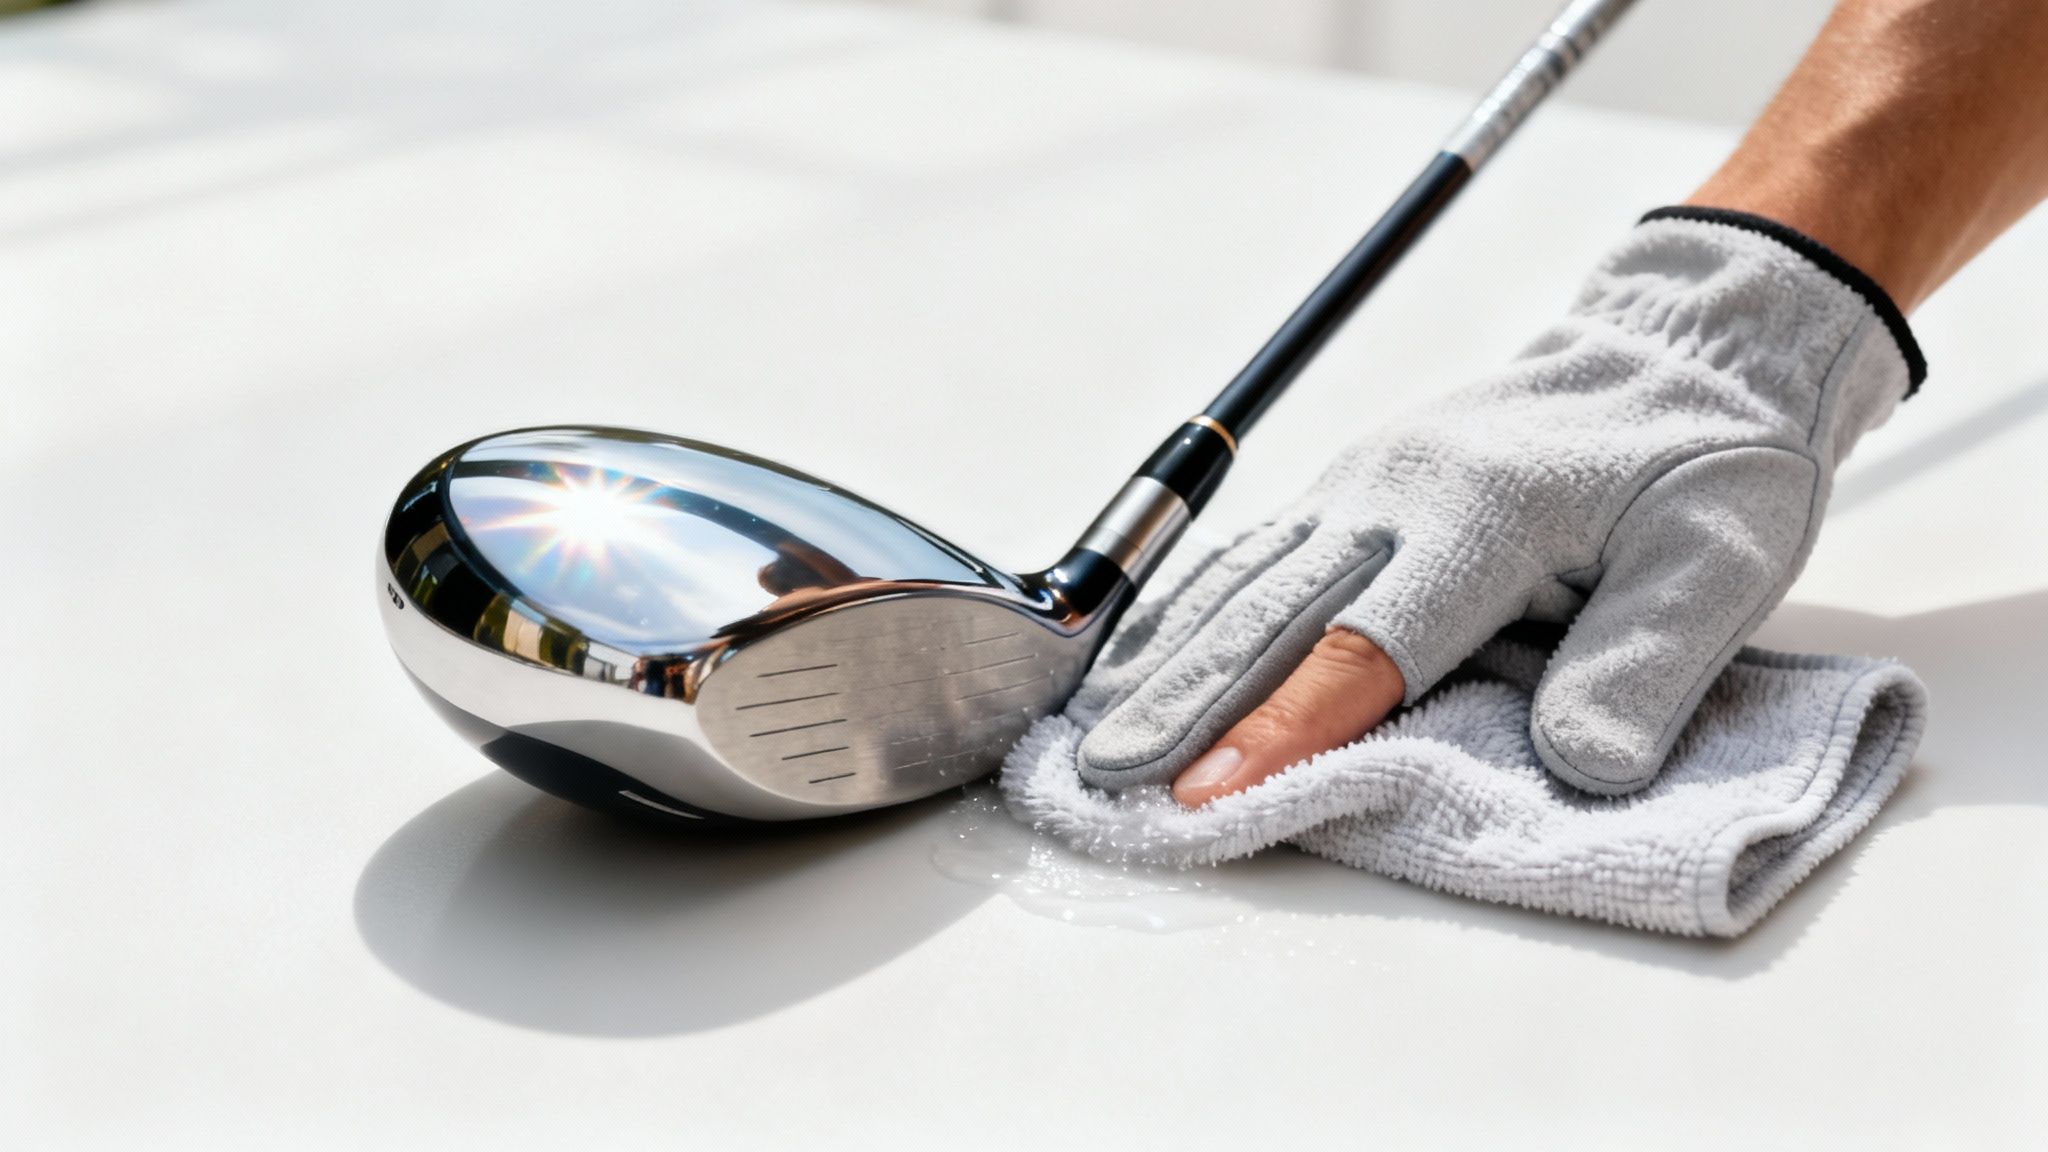
The Wipe Down Method
First things first, grab a clean towel and dip a corner into your bucket of warm, soapy water. Now, wring it out like your life depends on it. You want it just damp, not dripping wet.
Gently wipe down the clubface, focusing on any grass stains or stubborn ball marks. You can put a little muscle into it here, but don't go crazy.
Next, give the sole and the top of the clubhead (the crown) a good wipe. If you’ve got a scuff mark on that glossy finish, fight the temptation to scrub it like you’re trying to start a fire. A gentle, patient circular motion with your damp cloth is usually all it takes to lift the mark without scratching the paint.
Pro Tip: The second you're done with the damp cloth, grab a completely dry towel and wipe the club down immediately. This isn't optional. Getting those woods and hybrids bone-dry right away is the single best way to keep moisture from sneaking inside the clubhead.
For that finishing touch, a clean, dry toothbrush works wonders. Lightly brush out any leftover dirt from the score lines on the face. This quick detail work ensures you get that pure, spin-generating contact you’re looking for, all without risking a drop of water damage. This gentle method keeps your big dogs in the fight and ready to launch.
Getting That Tacky Feel Back in Your Grips and Shafts
Let's be honest, we all obsess over a sparkling clubface, but what about the only part of the club you actually touch? Your grips. They're magnets for sweat, sunscreen, dirt, and all the natural oils from your hands.
Eventually, they build up this slick, shiny film that completely robs you of your feel. A great swing means nothing if the club feels like it’s about to fly out of your hands.
Bringing Grips Back from the Dead
Luckily, restoring that "like-new" tackiness is ridiculously easy. You just need some warm water, a drop or two of mild dish soap, and a soft brush.
Gently scrub the entire surface of the grip. Don't be shy—you're trying to strip away that layer of grime that’s built up over countless rounds. You'll probably be shocked (and a little disgusted) by what comes off.
The All-Important Rinse and Dry
Once you’ve given them a good scrub, rinsing thoroughly is key. If you leave any soap residue behind, your grips will turn into a slippery mess the next time you play in the dew or get caught in a little rain.
After a solid rinse, grab a clean towel and pat the grips down firmly. Let them air dry completely before you even think about sliding them back into your golf bag.
As for the shafts? A quick wipe-down with a damp cloth is all it takes to get rid of fingerprints and dirt, keeping your entire setup looking pristine.
Think of it this way: skipping this simple routine is like throwing money away. Data from the golf course service market has shown that well-maintained clubs can last up to 30% longer. When a new set of irons can easily top $1,000, that’s a real saving.
This isn’t just about looking good. It’s about restoring that confident, responsive connection you need for every single shot. Make this a non-negotiable part of your post-round routine. It’s a win-win that pays off on the scorecard and protects your investment.
A Few Lingering Questions About Cleaning Your Clubs
Even the most seasoned golfers have a few questions that pop up now and then. Let's tackle some of the most common debates about keeping your clubs in pristine shape, so you can build a routine that feels less like a chore and more like part of the game.
How Often Should I Really Be Cleaning My Clubs?
In a perfect world, you'd give the clubface a quick wipe with your towel after every single swing. Seriously. This little habit prevents dirt and grass from caking into the grooves in the first place. Think of it as preventative maintenance.
As for a more thorough scrub-down with soap and water, a good rule of thumb is to do it after every round. A full-on, deep clean like we've walked through here? That's perfect for every few rounds or definitely before a big tournament. The real secret is consistency—it's your best weapon against stubborn gunk and the first signs of rust.
Is It Ever Okay To Use a Wire Brush?
Let me be blunt: please, for the love of your expensive gear, step away from the wire brush. It might seem like the perfect tool for blasting away dried-on mud, but it’s far too aggressive for your clubs. It will absolutely scratch the face and chew up the finish, particularly on your modern irons and fancy woods.
Those scratches aren't just ugly; they're invitations for rust and can even mess with the club's performance. Always, always stick to a soft nylon or plastic bristle brush. It’s more than enough to get the job done right without causing any damage.
Look, storing your clubs wet is the fastest way to grow rust on your shafts and mildew in your bag. A few minutes of drying time is a simple step that will save you a ton of headaches and cash down the road.
What’s the Best Way to Tackle Rusty Clubs?
Spotted a bit of rust? Don't panic. For light surface rust, a cloth soaked in a 50/50 mix of white vinegar and water usually works wonders. Just let it sit on the rusty spots for about an hour, then give it a gentle scrub with a soft brush.
If you’re dealing with more stubborn patches, you can carefully use some extra-fine steel wool, but know that it might scuff the finish a bit. Once the rust is gone, dry the club completely and wipe it down with a light coat of WD-40 or a similar oil. This creates a protective barrier against future moisture.
Just like you wouldn't leave your favorite cap out in the rain, your clubs need a little protection. Speaking of which, keeping all your gear clean is part of looking and playing the part. You can check out some tips on the best ways to clean your golf hats to keep your whole setup looking sharp.
Here at 2ndShotMVP, we know that looking good and playing well go hand-in-hand. While you're keeping your clubs in tournament shape, make sure your on-course style is just as dialed in. Check out our collection of premium golf hats and apparel at https://2ndshotmvp.com.
Article created using Outrank

