
Figuring out how to clean a golf hat really comes down to a simple philosophy: know your material, use the gentlest method you can, and always let it air dry. Trust me, for most hats, a quick spot clean or a careful hand wash with a little mild soap is all it takes to tackle sweat stains and dirt without wrecking its shape.
Your Pre-Game Cleaning Checklist
Before you even think about getting your hat wet, a little prep work is essential. You wouldn't just grab any club and swing, right? The same goes for cleaning. Just throwing every hat into the same cleaning routine is a surefire way to end up with a misshapen, faded mess.
First things first, check the material. Is it sturdy cotton, a modern performance synthetic, or maybe a more delicate wool blend? The material is your guide for everything else. Once you know what you're working with, you can decide if it just needs a quick spot treatment for a small mark or a full-on hand wash to deal with a round's worth of sweat and grime.
Gathering Your Supplies
The good news? You probably have everything you need already. No fancy, expensive cleaners required.
- Mild Detergent: A gentle laundry soap or even a drop of dish soap will do the trick.
- Soft Brush: An old toothbrush is perfect. It has enough backbone to scrub away stains but is soft enough not to damage the fabric.
- Clean Cloth or Towel: Grab one for dabbing on the cleaning solution and another for patting the hat dry later.
- A Bowl or Sink: You'll need this if you're giving the hat a full bath.
This simple infographic is a great visual guide for matching water temperature and detergent to common hat materials.
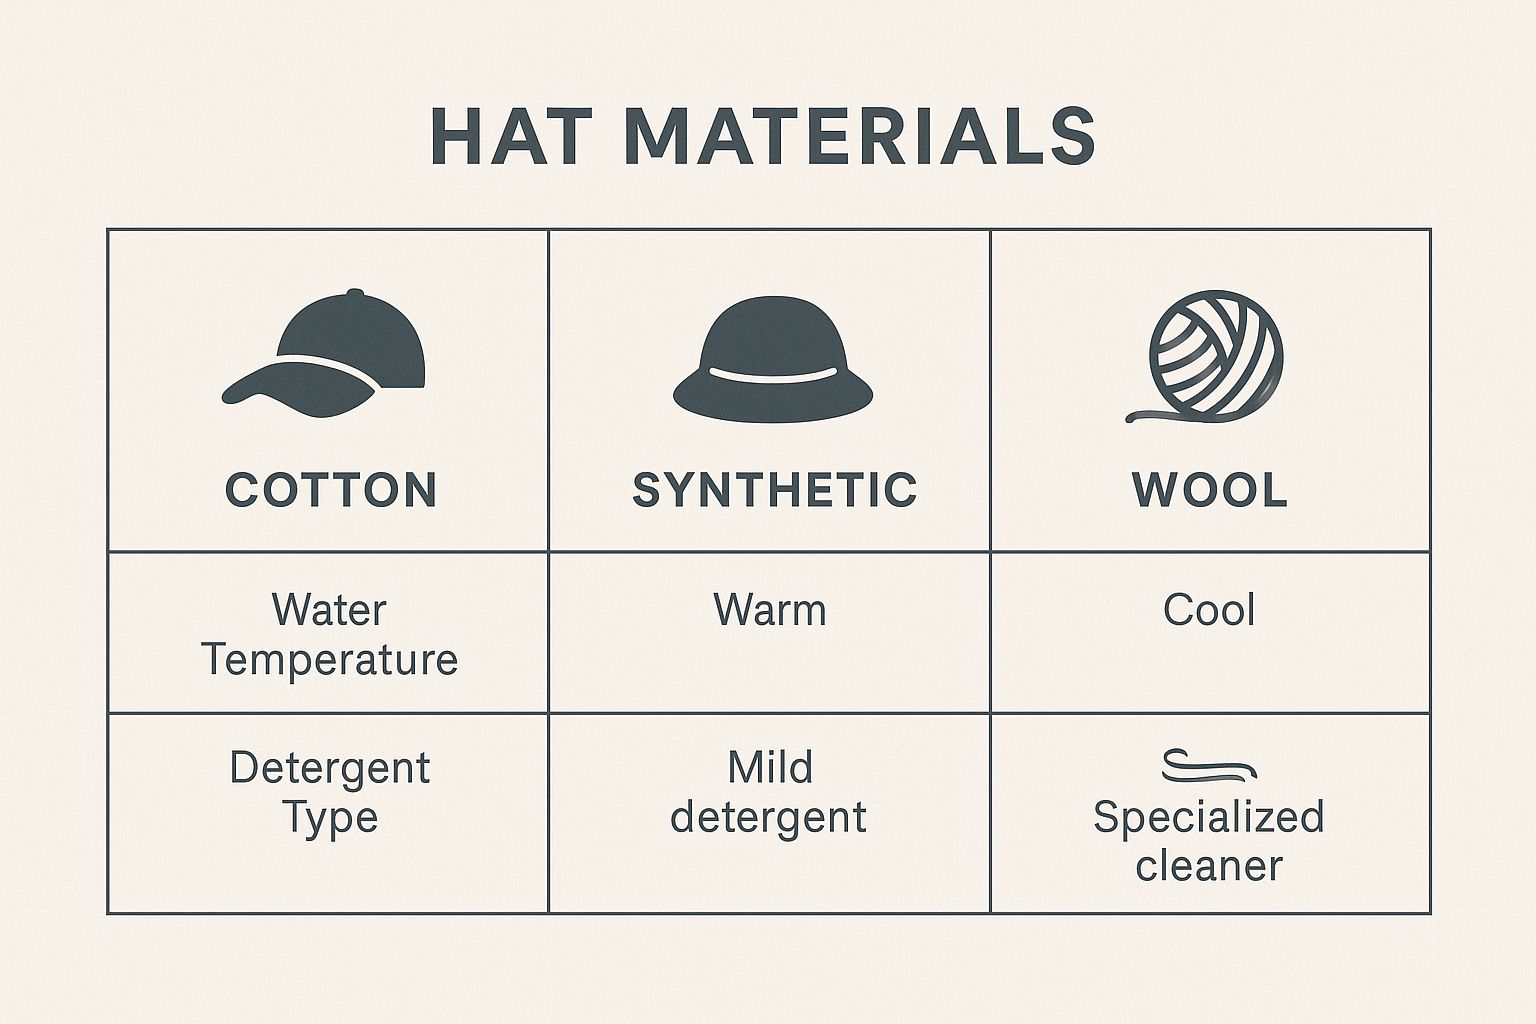
As you can see, cool water and mild soap are your safest bet, no matter the material. It's no surprise that one survey found 85% of golfers prefer hand washing to keep their hat's shape and color intact. It's just the smarter play. Knowing the ins and outs of your gear is part of the game, and you can explore more about premium golf headwear and apparel in our deep dive.
The Best Way: A Gentle Hand Wash
When it comes to cleaning a golf hat you love, trust me, hand washing is the only way to go. It’s the safest, most reliable method for getting rid of sweat and dirt without wrecking the hat's shape or fading its color. I know it's tempting to just toss it in the laundry, but the washing machine is a death sentence for a good cap. This approach puts you in control and keeps your favorite lid looking sharp for your next tee time.
First things first, let's get your cleaning mix ready. Grab a clean sink or a small basin and fill it with cool water. And I mean cool, not warm or hot. Hot water is your enemy here—it'll make colors bleed and can shrink certain fabrics in a heartbeat.
Now, add just a tiny bit of mild laundry detergent. A teaspoon is usually more than enough. You're looking for slightly sudsy water, not a full-on bubble bath. Give it a good swirl with your hand to make sure all the soap dissolves before the hat even touches the water.
Getting It Ready and Soaking
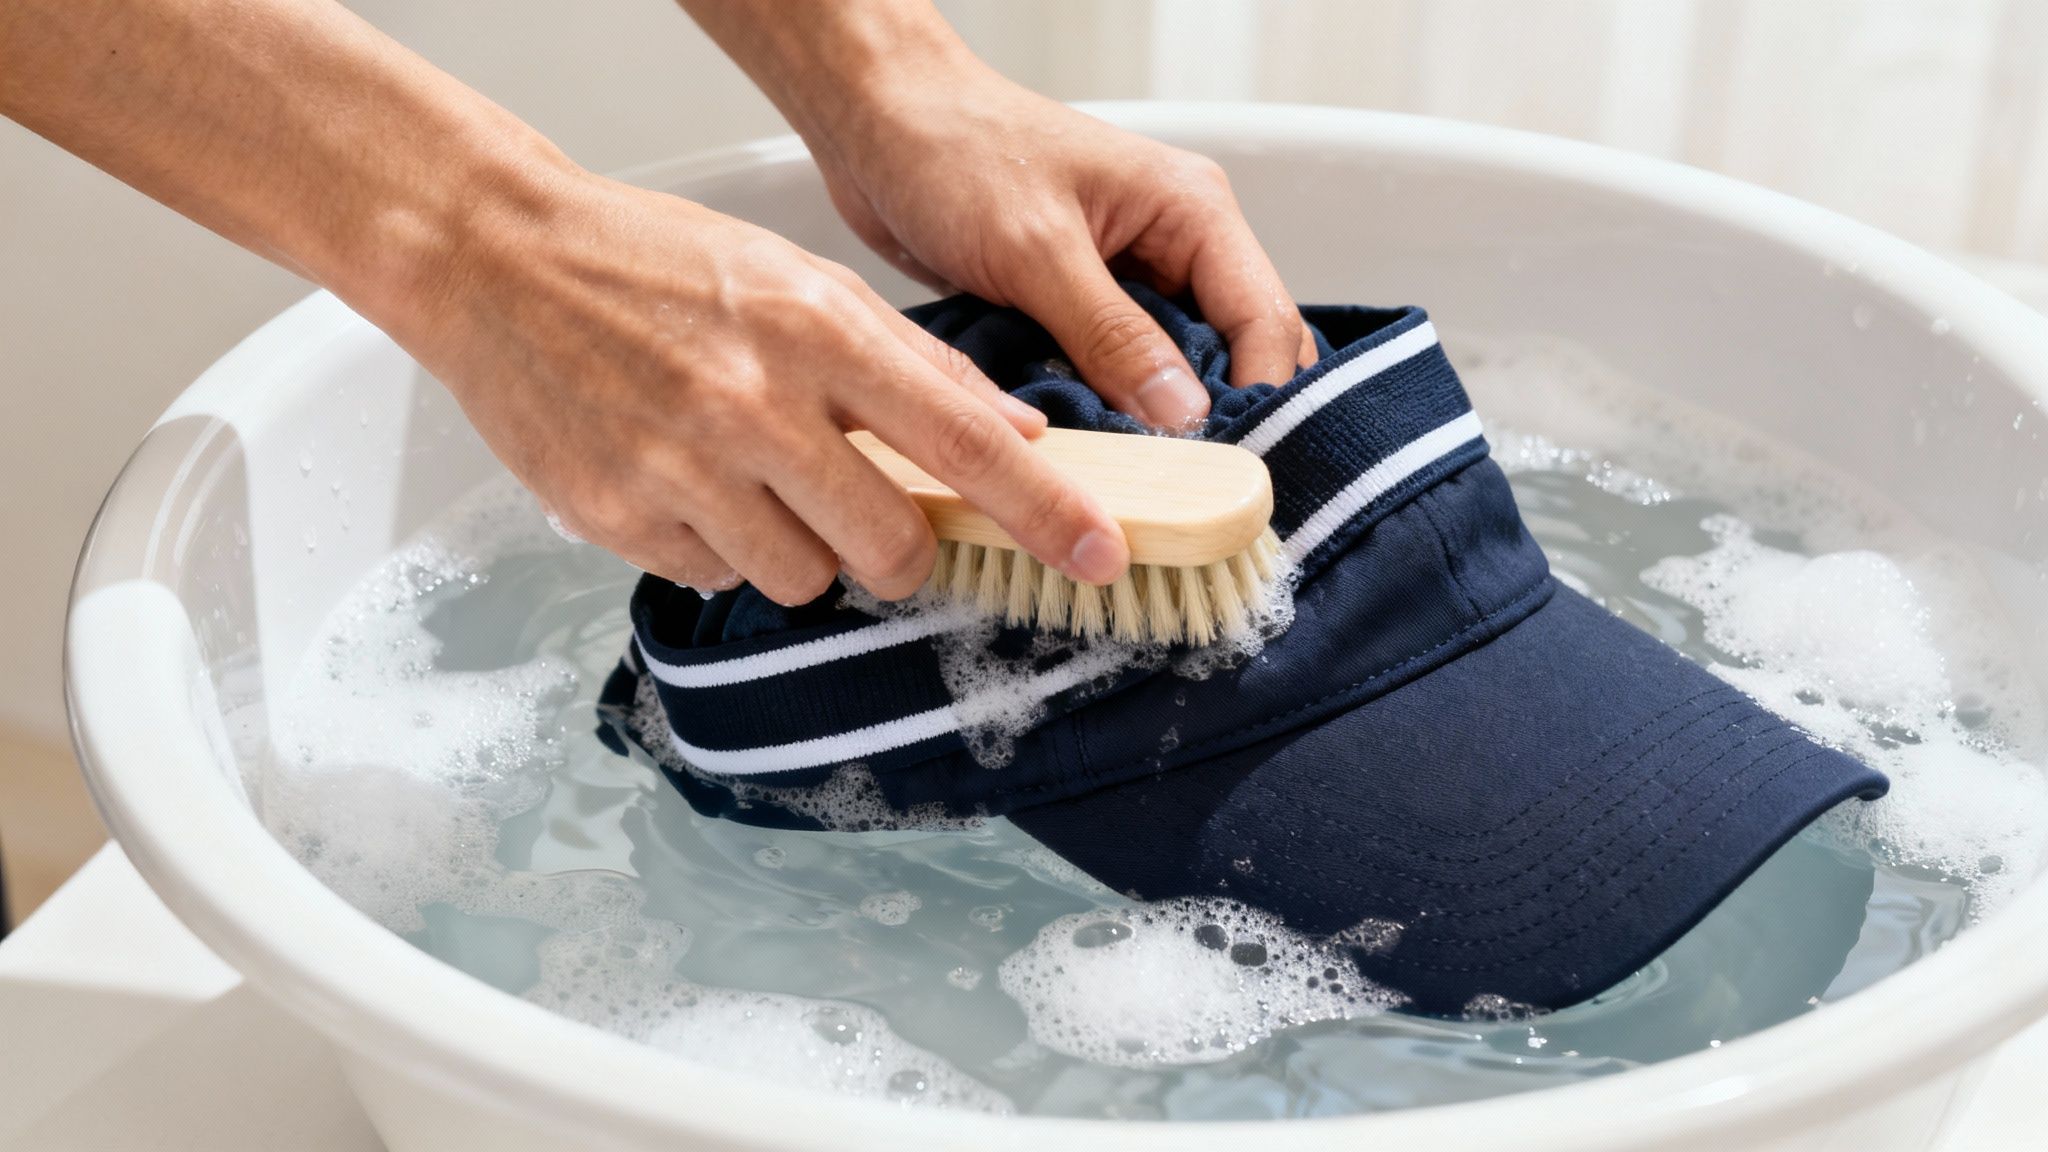
Before you dunk the whole thing, take a minute to spot-treat any obvious stains. Got a stubborn spot on the brim? Grab a soft-bristled brush (an old, clean toothbrush works perfectly) and gently scrub the area with a dab of your detergent mix. Always, always pay extra attention to the sweatband. That’s where all the gross stuff—oil, sweat, sunscreen—really builds up.
After you've hit the main spots, it's time to submerge the hat in your cool, soapy water. Let it hang out in there for about 20-30 minutes. This little soak does most of the heavy lifting for you, allowing the detergent to break down all that caked-in grime without you needing to scrub like a maniac and risk damaging the fabric.
My Two Cents: If your hat has some cool embroidery or a vintage patch, be super careful around those areas. The idea is to lift the dirt off, not pull the threads out.
Once it’s had a good soak, you can give the dirtiest parts another quick pass.
- The Sweatband: This is priority number one. Scrub the inside band gently using small, circular motions. This is where you’ll eliminate most of the odor and stains.
- The Crown and Bill: Use light, even pressure to clean the rest of the hat, always moving with the grain of the fabric, not against it.
The Rinse and Final Steps
Getting all the soap out is just as critical as the wash itself. Drain the dirty water and refill the sink with fresh, cool water. Dunk the hat and swish it around to rinse away the suds. You’ll probably need to do this a couple of times. You want to be absolutely sure there's no detergent left, because any residue will just become a magnet for more dirt later on.
Whatever you do, don't wring or twist the hat to get the water out! That’s the quickest way I know to completely ruin its shape. Instead, gently press the hat between your palms or against the side of the sink to squeeze out the excess. Then, pat it down with a clean, dry towel to soak up as much moisture as you can.
Taking care of your gear is all part of the game. And if you’re ever in the market for a new favorite, check out our collection of premium golf hats USA.
Tackling Tough Sweat Stains and Odors
We’ve all been there. You finish a great round under the sun, pull off your favorite hat, and there it is—that unmistakable yellow sweat line creeping across the brim. Those stubborn marks and the not-so-fresh smell that comes with them can make a perfectly good hat feel unwearable. But don't toss it in the back of the closet just yet.

With a few simple things from your kitchen, you can get that hat back in playing condition. The real trick is breaking down the oils and salt from your sweat, which is what actually causes the discoloration and odor. The good news is, you probably have everything you need on hand.
Creating a Baking Soda Paste
For those really concentrated, set-in stains, a baking soda paste is my secret weapon. It’s just abrasive enough to lift the grime without being harsh on the fabric. I find this works especially well on the inner sweatband where all the gunk really builds up.
Just mix about four tablespoons of baking soda with a quarter cup of warm water. You're looking for a thick paste, something like the consistency of toothpaste. Grab an old toothbrush, apply the paste directly onto the stained spots, and let it sit for up to an hour. The baking soda does a fantastic job of pulling the stain right out of the fibers.
Don't be shy with the paste. You want to completely cover the stain for it to really work. After it’s had time to sit, give the area a gentle scrub in small circles before rinsing it all off with cool water.
And this isn't just some old trick I picked up; it's a proven method. In fact, some studies show that about 40% of golfers struggle with sweat stains that can be easily treated with household items. For a deeper dive, check out some more hat stain removal tips.
The Power of a Vinegar Pre-Soak
If the bigger problem is a general funky smell rather than a specific stain, a white vinegar pre-soak is your best bet. Vinegar is a natural deodorizer and it's brilliant at neutralizing odors trapped deep in the fabric.
Before you give your hat a normal hand wash, try this first:
- Fill a sink or basin with equal parts cool water and white vinegar.
- Dunk your hat in, making sure it's completely submerged.
- Let it soak for a good 20-30 minutes.
This little pre-treatment tackles the smell at a molecular level without any harsh chemicals. Once the soak is done, just follow up with one of the gentle hand-washing methods. And don't worry—the vinegar smell completely vanishes as the hat dries, leaving it smelling totally fresh. It's a lifesaver for those synthetic performance hats that seem to hold onto odors for dear life.
So, Can You Really Just Toss Your Hat in the Dishwasher?
https://www.youtube.com/embed/Yh03iMIdS6I
You've probably heard the advice whispered in the clubhouse or seen it pop up online: just stick your grimy golf hat in the dishwasher. It sounds like the perfect life hack, right? A quick, hands-off way to get it clean. But honestly, I have to tell you, it's a gamble I wouldn't take with my favorite cap.
The idea is to place the hat on the top rack, maybe in one of those plastic hat frames, and run a cycle using a gentle, non-bleach detergent. The most critical part is making sure the heated dry function is off, because that high heat will absolutely destroy your hat’s shape.
While this might, and I mean might, work for a cheap, super-sturdy baseball cap, modern golf hats just aren't built for that kind of treatment.
The Real Risks of the Dishwasher Hack
Let's be blunt: the combination of scalding hot water, high-pressure jets, and harsh dishwasher soap is a recipe for disaster. It's way too aggressive for most materials.
- Color Fading: That intense heat is notorious for making vibrant colors bleed and fade.
- Fabric Damage: Delicate fabrics, especially wool blends, can shrink so badly you'll never get them back to their original size.
But the biggest killer here isn't just the fabric—it's the brim. Dishwashers can completely obliterate the structural integrity of the brim's cardboard or plastic insert. You'll end up with a lumpy, warped mess that’s beyond saving.
Think about it this way: there's a good reason why a survey found that 60% of golfers stick to safer hand-washing methods. With some estimates suggesting that 25% of hats get damaged during cleaning—usually from rough techniques like this—the dishwasher is a high-risk, low-reward play. If you're curious, you can discover more insights on why gentle cleaning is preferred at henschelhats.com.
I get it, convenience is tempting. But ruining a perfectly good hat is a tough pill to swallow. Stick to the proven, safer methods to make sure your headwear stays in top form for many more rounds to come.
Drying and Reshaping Your Hat Like a Pro
Don't let a great wash go to waste with a sloppy drying job. I've seen it a hundred times: someone does a fantastic job cleaning their hat, only to toss it on a counter to dry. You'll come back to a crumpled, sad-looking mess that's worse than when you started.
The real secret to keeping that perfect shape is all in the air-dry.
Let me be crystal clear on one thing: never use a machine dryer. The high heat will absolutely destroy your hat. It shrinks the fabric, melts any plastic components, and permanently warps the structure inside the brim. You can't undo that kind of damage. Direct sunlight is another no-go, as it’ll fade the color in a hurry.
Maintaining the Perfect Shape
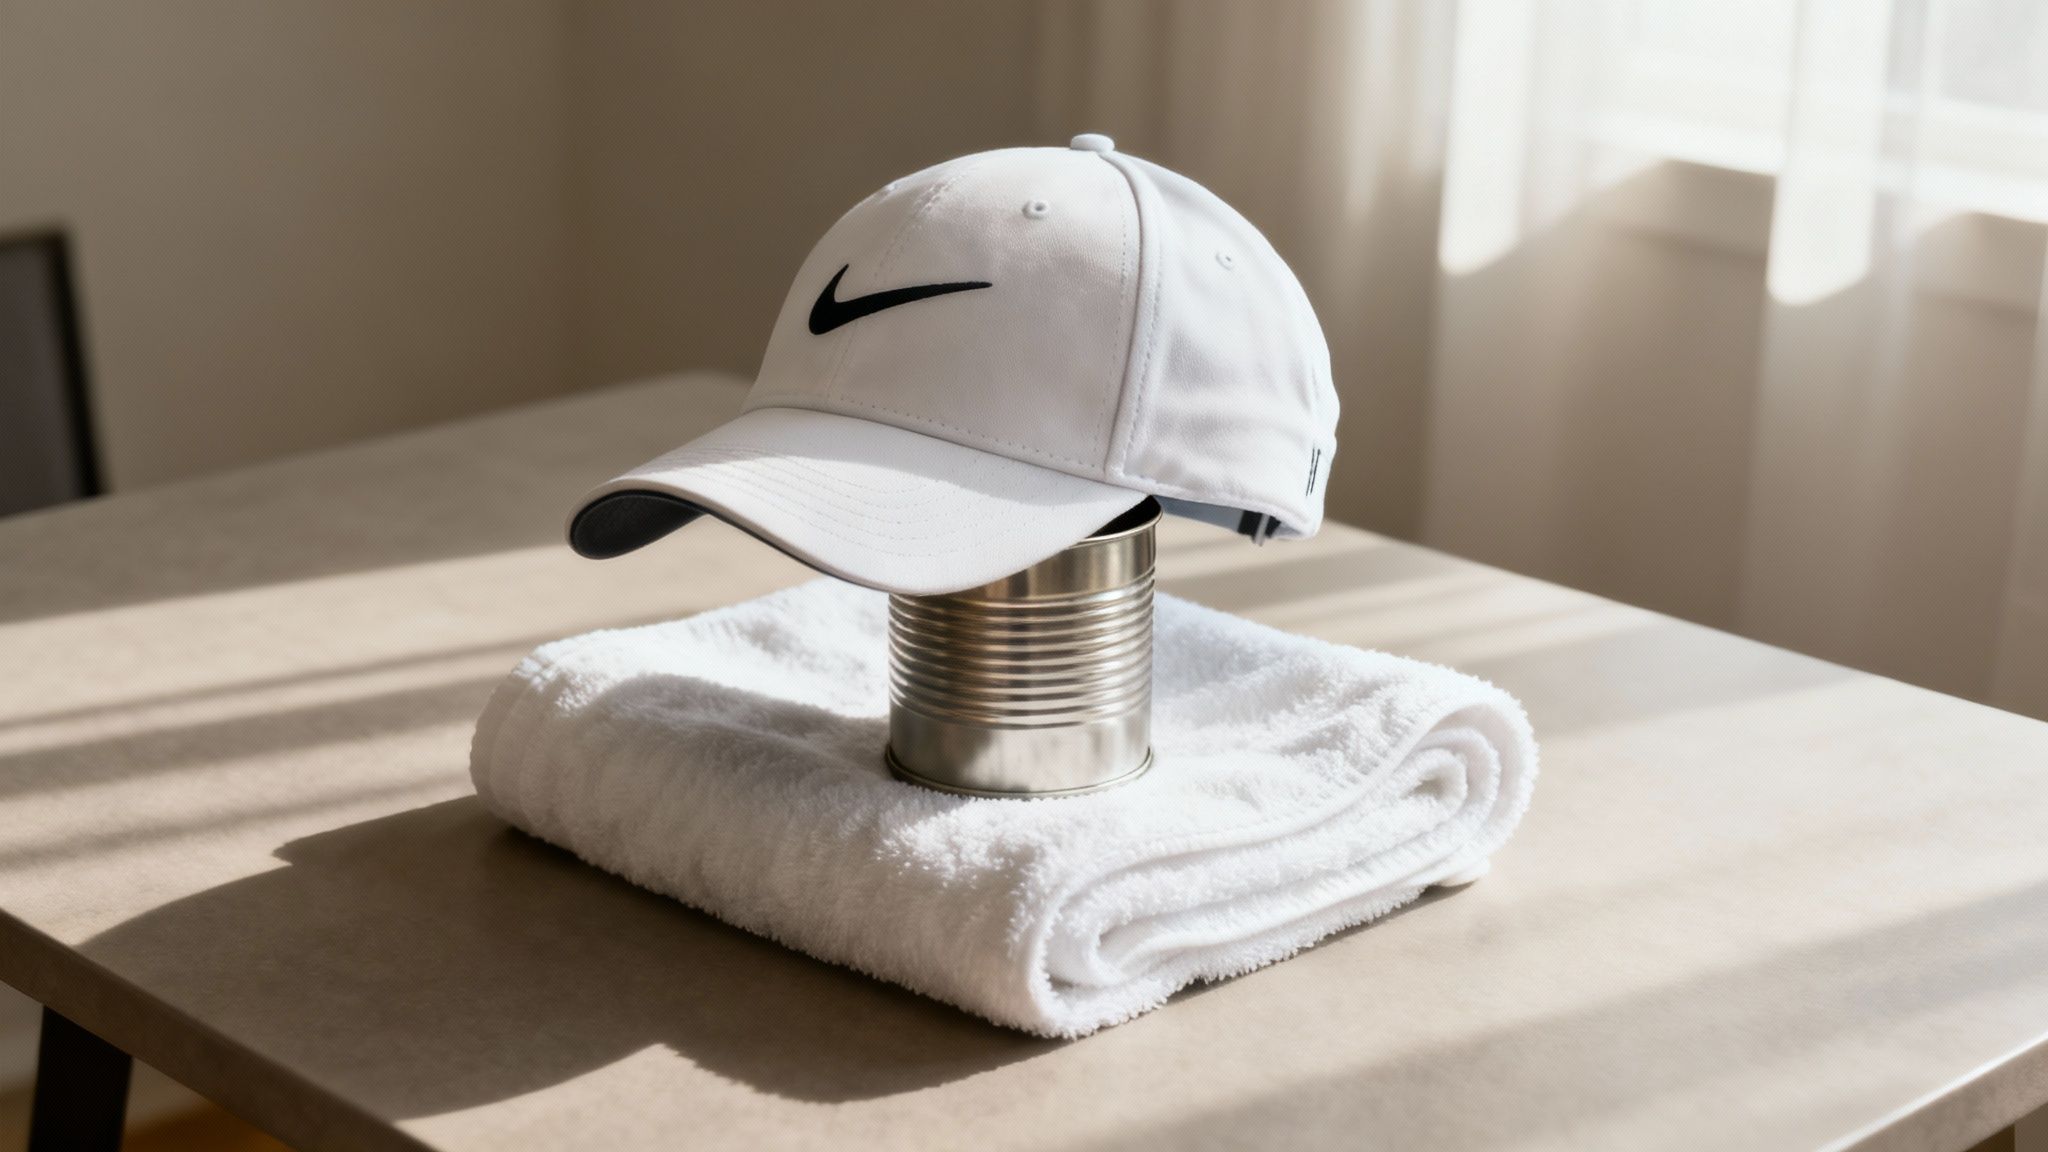
To keep the crown of your hat perfectly rounded while it dries, you just need to give it some support. No fancy gadgets required—you've got something around the house that will work perfectly.
I've found these everyday items work like a charm:
- A large coffee can or a wide jar.
- A rolled-up towel stuffed firmly inside.
- Even a balloon blown up to the right size works in a pinch.
Honestly, this one simple step is the difference between a hat that looks brand new and one that looks like it's been through a wringer. It’s how you keep it looking as sharp as a new Wyoming MVP Open-Back hat you'd find in the pro shop.
A Few Final Pointers on Keeping Your Hat Fresh
Even when you know the basics, a few tricky questions always seem to come up when it comes to hat care. I've heard them all over the years, so let's tackle a few of the most common ones to make sure you don't accidentally wreck your favorite cap.
First up: how often should you actually wash your golf hat? Honestly, a quick spot-clean every few rounds is a great habit to get into, especially after a hot day. This stops sweat and grime from getting a permanent foothold, making your life way easier down the road.
Of course, if you see a gnarly stain or it starts to smell a little funky, it's definitely time for a proper wash.
Can I Just Toss It in the Washing Machine?
I’m going to give you a hard "no" on this one. I’ve seen too many good hats die a tragic, misshapen death in a washing machine. The spinning and tumbling, even on a delicate cycle, will absolutely wreck the hat's structure and mangle the brim. It’s just not worth it.
Hand washing is your best bet, every single time. If you’re dead set on trying a machine, get one of those plastic hat cages and use the coldest, gentlest cycle your machine has. But even then, you're rolling the dice.
Seriously, the five minutes you might save by using a machine isn't worth the very real risk of ruining a $30 hat. A gentle hand wash is the only way to guarantee it keeps its shape and looks great for seasons to come.
What’s the Secret to Cleaning a White Golf Hat?
Ah, the classic white hat—looks sharp, but shows every single smudge. Your best friend here is an oxygen-based cleaner, like OxiClean. Do not use chlorine bleach! It’s a fast track to yellowing, especially on the synthetic fabrics most performance hats are made of.
Here’s my go-to method:
- Mix a little of the oxygen cleaner powder with some water to form a paste.
- Dab that paste directly onto any sweat stains or dirt marks.
- Let it sit for 20-30 minutes to work its magic.
- After that, just follow the regular hand-washing steps.
This little trick is a lifesaver for lifting out those stubborn grass and sweat stains, bringing that brilliant white back to life.
Ready to put these tips to the test on some new gear? You can find a great selection of premium golf hats and apparel over at 2ndShotMVP. Go find a new favorite you’ll be proud to keep looking brand new. https://2ndshotmvp.com
Article created using Outrank
